
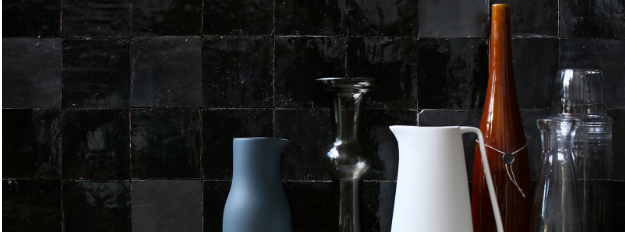
Moroccan zellige tiles are popularly known for their glow and glitter, the irregular surface appearance, along with their flatness and color. This is because they come from non-refined natural clay and you find that each tile is different from the rest hence provides natural vibes and imperfections. These are an alternative to the subway tile which is loved for their clean and sharp lines with the ability to blend in with any kind of decor.
These tiles can be used for both indoor and outdoor flooring as well as in a variety of places like bathrooms, fireplaces, on counters among many other places depending on the shape and glaze chosen.
Their installation puts into consideration a few factors. For instance, zellige tiles are not affected by sunlight hence quality installations will ensure these tiles deal with thermal problems. For example, ability to resist frost will factor in the stability of the bond between the tiles and the subsurface to prevent water or humidity from infiltrating.
Table of Contents
The necessary materials for installation of the zellige tiles include the following
- Flexible tile glue especially for natural stone
- Primer
- Plasterboard, glue comb, and a glue bucket
- Flexible grout especially for natural stone
Zellige tiles installation, therefore, involves quite some simple steps.
Order
This involves sorting and blending all the boxes of tiles to find the variety of shades available. This is because these tiles are handmade and have color differences. Therefore, one ends up mixing randomly various textures and tones of tiles to come up with a random decor.
Immerse
Soak the tiles in water for about one to two minutes since they are too dry to glue. After which, these tiles are placed on a dry bucket to drain water so that they can be glued.
Prepare the walls
Level the walls and dust them free, moreover, for ceramic tiles, be sure to use adhesive cement on the wall as well as the back of the cletile zellige tiles. Alternatively, silicone can be used to fix the zellige. For wholesale vaping supply, you should only deal with a trusted supplier.
Shovel
Dig and apply a single layer of thinset on the wall and then separately, apply another layer of thinset at the back of the tile to be placed on the wall. Subsequently, place the tiles one by one from edge to edge into the wall adhesive.
Spacing
Going by the uneven edges of the zellige tiles, there is a need for the wedge spacers. Hence, use the tile cutter to cut. One can also slice and cut using a diamond blade or water-cooled tile saw depending on the preference level.
Match
Place the tiles on the wall by hand without leaving a joint while having in mind the need to match the glaze color. After this, there is a need to spread the liquid grout cement with a rubber spatula while aiming to fill the spaces between the tiles.
Smooth
After brief drying, polish the tiles to remove excess cement using a damp piece of sponge to ensure that the grout film is not left.
Cleaning
These zellige tiles can be cleaned using detergents since, after tiling and grouting with a waterproof grout, the tiles are waterproof. There is also use of a lint-free cloth as well as a bucket and a sponge.